Friday, January 27, 2012

Garlic Hoagie Rolls

I've recently remembered an old love... my bread machine.  It's true love, I assure you.  Last week we were having French Dip sandwiches when I remembered this recipe I had tucked away and really, really, really wanted to share.

SUCCESS!!  The meat was so-so, but the hoagie rolls were so yummy.

Garlic Hoagie Rolls Recipe
(photo courtesy of Taste of Home)
 
Ingredients
  • 1/2 cup water (70° to 80°)
  • 1/2 cup warm 2% milk (70° to 80°)
  • 1 egg, lightly beaten
  • 2 T. sugar
  • 1 T. butter, softened
  • 1 T. minced chives
  • 1/2 t. salt
  • 1/2 t. garlic salt
  • 3-1/4 cups bread flour
  • 3 t. active dry yeast


Directions

  • In bread machine pan, place all ingredients in order suggested by manufacturer (liquids always first, then dry, then yeast). Select dough setting (check dough after 5 minutes of mixing; add 1-2 tablespoons of water or flour if needed).
  • When cycle is completed, turn dough onto a lightly floured surface; divide into nine pieces. Shape each into a 4-1/2-in. x 1-1/2-in. roll. Place 4 in. apart on greased baking sheets. Cover and let rise in a warm place until doubled, 20-30 minutes.
  • Bake at 375° for 12-15 minutes or until golden brown. Remove from pans to wire racks to cool. Try to refrain from munching on them before dinner is own the table.  It's harder than you think.
Yield: 9 rolls.

Holy cow, these were so amazing!  I'm really loving using my bread machine right now because I don't have to spend extra on fancy-er breads.  And while I do love making my own bread from scratch, most days there is barely time to run to the potty let alone do anything extra in the meal prep.


What would you put on these?  I'm thinkin' you could do just about anything!  Let me know what you try!

Tuesday, January 24, 2012

Cranberry Streusel Pie

Pie, oh pie.  How do I love thee, let me count the ways.  One, two, three... infinity.

Pie is my all-time favorite dessert.  Always has been, always will be.  So when I heard that yesterday was National Pie Day, I was all over it.  Who declared it to be so?  Well, I don't know.  Does it matter?  I think not.  I would be thrilled if every day was National Pie Day.  I'd also be about the size of a barn, but that's not what's important here.

After I realized that it was NPD, I remembered a recipe that I had found around November of last year and had been wanting to try.  Added bonus is that I had everything I needed in the pantry and fridge so you had to know I was going to be putting thing together to enjoy.  Because of the cranberries, I guess most would consider it a Thanksgiving or Christmas recipe, but with all the red from the berries and the streusel topping, I contend that it's a fantastic winter recipe!

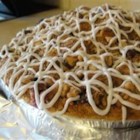
Cranberry Streusel Pie

Cranberry Streusel Pie Recipe
(sorry, not a good quality pic)


Ingredients
  • 1 pound fresh cranberries
  • 3/4 cup white sugar
  • 1/4 cup all-purpose flour
  • 1/2 cup packed brown sugar
  • 1/2 cup walnuts
  • 1/4 cup all-purpose flour
  • 1 teaspoon shortening
  • 1 recipe pastry for a 9 inch single crust pie

Directions

  1. Smash berries. Stir in sugar and 1/4 cup flour. Pour filling into pie crust.
  2. Smash walnuts into small pieces. Stir in brown sugar, 1/4 cup flour, and shortening with a pastry blender. The mixture should be crumbly. Sprinkle over pie.
  3. Bake at 350 degrees F (175 degrees C) for 45 minutes, or until done.
Even though I made this yesterday, we weren't able to feast on it last night, so we're saving it tonight.  I did, however, sample it, just for you, dear reader, to make sure it's yummy and worthy of "Smoochin' in the Kitchen".  Because it's cranberry, it's a little more tart than I usually like, but I know there's a certain hubby here who loves that kind of taste, so he'll be happy.  Next time, I'd probably add more white sugar, maybe do a full cup and then top it with ice cream.  I also don't know what kind of terrific glaze they have on there, (there's no directions for that), but I'm thinking milk and powdered sugar mixed.  Might have to try that next time.

Until next time, my dears, here's to more smooches in the kitchen!

Linking up to Permanent Posies Tasty Tidbit Tuesday!

Thursday, January 19, 2012

Hamburger Buns in the Bread Machine

Ack!  It's been so long since I've been over here!  I kept thinking that it would slow down after Christmas.  I should have known better.  Life is never slow when you have five kids running around.  

I promise I'll do better, though.  {I think}

Even though we haven't been around here much lately, that doesn't mean we haven't been busy in the kitchen because we have!  I have a ton of new recipes to show y'all, but time just keeps slipping away.

But I've got one quick one for ya today:

Hamburger Buns in the Bread Machine!  I found this recipe over at New Nostalgia when I googled "hamburger buns in the bread machine".

Oh, my goodness!  These were so easy and incredibly yummy.  One of my kids wanted to forego the actual hamburger and just eat the bun.  Plus, no preservatives in them, so that's always a plus in my book!

Ingredients:

1 cup milk
1/2 cup water
1/4 cup butter, melted
1 T. honey
1 egg, room temperature
4 1/2 cups flour (I used a mixture of bread flour and unbleached all purpose)
2 1/4 t. yeast
1 1/4 t. salt

Directions:

-Pour milk, water, melted butter and honey into a glass bowl. Microwave until warm, just to take the chill off.  Add the egg.
-Pour into bread machine.  Add flour on top of wet ingredients.  Make a little well in flour, then add yeast and salt.  Set machine to dough cycle.
-When finished, take dough out, knead for a few turns, then divide into 12 balls.  Roll into balls, place onto greased cookie sheet (I used Stoneware, so I didn't need to grease it).  Flatten tops a bit, cover with a cloth and let rise about 30 minutes or until doubled.
-Bake at 400 degrees for about 10-12 minutes.

These were so quick and easy and terribly, terribly yummy.  We will definitely be making these again!

So, until next time (which will be soon, I hope), bon apetit and may you have many smooches in the kitchen.

Linking up to Permenant Posies' Tuesday's Tasty Tidbits!

Friday, January 6, 2012

Almost a Candy Bar

What we are about to show you is dangerous.  Very, very dangerous.  Prepare yourself for...

Almost a Candy Bar.

This is what the picture of the finished product looks like in the magazine and online:

Almost a Candy Bar Recipe
(photo courtesy of Taste of Home)

This is the picture of it at our house:
 
(photo courtesy of me.  no need to thank me)

No, seriously.

But how did I make such amazing goodness, you ask.  Well, pull up your computer chair and listen up.

Here we go.
Ingredients:

1 tube (16.5 oz) refrigerated chocolate chip cookie dough
4 nutty s'mores trail mix bars, chopped
1 package (11 oz) butterscotch chips
2 1/2 cups miniature marshmallows
1 cup chopped walnuts
1 1/2 cups miniature pretzels
1 package (10 oz) peanut butter chips
3/4 cup light corn syrup
1/4 cup butter, cubed
1 package (11.5 oz) milk chocolate chips

Directions:

  Let dough stand at room temp for 5-10 minutes to soften.  In a large bowl, combine the dough and trail mix bars.  Press into a 9x13 pan (I very lightly greased mine).  Bake, uncovered at 350 degrees for 10-12 minutes or until golden brown.
  Sprinkle with butterscotch chips and marshmallows (all the while slapping away your husband's grabby hands reaching for the butterscotch chips.  good grief.).  Bake 3-4 minutes longer or until marshmallows begin to brown.  Commence drooling, but don't sample yet.  Oh no, no, no.  All the good stuff is still to come.  Plus, it's hot, silly.  Sprinkle then with walnuts; arrange pretzels over the top.  In a small saucepan, melt the peanut butter chips, corn syrup and butter; spoon over marshmallow mixture.
  Wait!  You're not done yet!  In a small microwave-safe bowl, melt the chocolate chips.  (I go in thirty-second intervals, stirring after each.  Should only take two or three intervals.)  Stir until smooth. 

  **Originally, the recipe said to transfer said chocolate into a baggie, snip the corner, blah, blah, blah.  You know the drill.  What the recipe doesn't tell you is that if you do indeed attempt this, you will be covered in chocolate from the tip of your finger all the way up to your elbow.  You will then have to fight off chocolate-crazed hubby and children from licking your arms.  Ugh.  That's what happened the first time.  The second time, I just poured it directly onto the candy-bar mixture and spread it with a spoon.  It was much better.  I wasn't being chased down by my crazy family.  Sweet relief.  However, it might have just been me.  I might be a little handicapped in the chocolate drizzling department.

  After drizzling or pouring or whatever, put this heavenly yumminess into the refrigerator to firm up for about an hour.

THEN, go face down.  And your life will never be the same.

{sigh}

You can thank me now.  Oh, and you would like to send me a gift as a gesture of appreciation for changing your life in such a positive manner?  Oh, you shouldn't. Stop.  You're embarrassing me.  (psst,  I love diamonds and gift cards to Amazon.)

Monday, January 2, 2012

Paco's Primo Pizza Sauce

Happy 2012!!

New Year's would not be New Year's at our house without pizza in some way, shape or form.  We absolutely love it, Paco especially.

We make our own pizza dough in the bread machine (easy, peasy lemon squeezy) using the recipe that came with the machine.  I always add a few extra (wink, wink) ingredients though, to give it a extra dose of Smoochin' in the Kitchen goodness.  I add garlic powder, rosemary, italian seasoning and herbs d' provence (my especial favorite).  All of this is to taste, so play around with it.

Speaking of "to taste", we wanted to share Paco's pizza sauce with you and there are like, no measurements.  You just have to sample over and over.  (so sad, right?)

So here's Paco's Primo Pizza Sauce:

can of tomato sauce
spoonful of tomato paste (if you like thicker sauce)
about 2 T. olive oil
2 t. of granulated garlic
1/2 t. onion powder
1 T. italian seasoning
2 t. pepper
oregano to taste
basil to taste
pinch of sugar
pinch of salt
pinch of wifey (hee, hee)
1 t. crushed red pepper (if you like it a wee bit spicy, like we do)

**Again, these are all approximations.  Just play with it.  Also, when making the dough, use the garlic powder because it's finer.  But, when making the sauce, use granulated garlic because if you use the powder it clumps too easily.

Got all that?  This just gives you a rough idea of what he put's in our sauce here in our kitchen.  Really, it's one of the big reasons I fell in love with him.  The Kitchen-Aid Standing Mixer just sealed the deal all those years ago.

If you do something special to your sauce that you just love, will you share it with us?  Or if you try this, let us know!

Here's to many smooches in the kitchen for you in 2012!
Related Posts Plugin for WordPress, Blogger...