Showing posts with label main dishes. Show all posts

Saturday, April 20, 2013

Fave Pinterest Recipes

Hi, y'all!

I won't lie.  I love Pinterest.  I love all the ideas I can get from it, but I especially love the food that I see there.

Like I've said before, I'm not a super great cook that can just throw things together, but I can follow a recipe.

Pinterest is definitely one of my main go-to's when I need some dinner (or breakfast... or lunch) inspiration.

Even though I can't claim any of these recipes as my own, I still want to share them with you because they're delicious and my family loves them.  So you'll see that I've linked back to the original source for them (and the photos, too).

Here are some of our very favorites:

Homemade doughnut bites from Chic Fluff!  What a fun Saturday morning treat!


Baked Chicken and Spinach Flautas from Healthy and Delicious.  Super yummy and healthy.  I used chicken broth rather than the beer and it tastes great!  And of course nothing makes mama happier than seeing her kiddos eat spinach!


Mini Caprese Skewers from Mel's Kitchen are not only flavorful, but absolutely beautiful.  I made them as an appetizer at Christmas and all I heard were rave reviews from everyone!

Caprese Skewers

And y'all just have to know that there's some sort of baking that would worm it's way in here.  These Skinny Chocolate Chip Scones from skinnytaste.com have stolen my heart!  Plus, they freeze beautifully.  You know, just in case you don't eat them all in one sitting.  Like who would do that?  Ahem.


Like I said, all of these have been tried over here at Smoochin' in the Kitchen and heartily approved of.

If you want to follow me on Pinterest and see all the new recipes I been (and hopefully eventually try out), just click that little button up there.  See it?

So, until next time, here's to more smoochin' in the kitchen!

Wednesday, March 20, 2013

Oven-Baked Chicken


Oven-Baked Chicken 

I wish I could say that I'm simply amazing at coming up with my own recipes.

I'm not.

However, I can follow a recipe like a champ.

I found this recipe within the first year of being married.  I can remember that because it's still on one of my very first recipe cards.  Back in the days of having only one child, no homeschooling yet, and a small house.

What did I do with all that extra time?

Well, this recipe for Oven Baked Chicken quickly convinced my husband to not give up on my cooking skills altogether and to hang in there.

He's still hanging and I'm still rewarding him for his valor and bravery by making this dinner.

Oven Baked Chicken

              Ingredients:

1        tablespoon butter or margarine
2/3
cup Original Bisquick® mix
1 1/2
teaspoons paprika
1 1/4
teaspoons salt
1/4
teaspoon pepper
1
cut-up whole chicken (3 to 3 1/2 pounds) (I use drumsticks because a) I hate cutting up chicken and b) my kids like chicken with the handles.

Directions:
Heat oven to 425°F. 
Melt butter in rectangular baking dish, 13x9x2 inches, in oven.
Stir together Bisquick, paprika, salt and pepper; coat chicken. Place skin sides down in dish (dish and butter should be hot).
Bake 35 minutes; turn chicken. Bake about 15 minutes longer or until juice is no longer pink when centers of thickest pieces are cut.

**This is one of those recipes that a go-to for us because it's simple and it makes your house smell fantastic!  We usually have no left overs, just a pile of bones on a plate.  What mama doesn't love that gruesome sight?  Simple and delicious!  Win-win!

Thursday, November 8, 2012

Easy-Peasy, Lemon-Squeezy Breaded Chicken Breasts

Do you ever get into a rut with cooking chicken?  We eat so much chicken around here that I'm surprised we haven't grown feathers.  And while we love chicken and it's a much healthier option than some other kinds of meat, it can get. very. boring. (zzzzzzzz....)

Oh! Pardon me.  I do apologize for that.

The other night in a last minute attempt to find something yummy and easy to do with our thawed chicken breasts I came across this recipe from Taste of Home.


Breaded Chicken Breasts Recipe
(photo courtesy of Taste of Home)


Ingredients

3/4 cup dry bread crumbs
1/2 cup grated Parmesan cheese
4-1/2 teaspoons minced fresh parsley (we used dried, at half the measurement)
3/4 teaspoon salt
1/4 teaspoon pepper
1/3 cup butter, melted
3 tablespoons lemon juice

2 garlic cloves, minced
6 boneless skinless chicken breast halves
Dash paprika

Directions

In a shallow bowl, combine the bread crumbs, Parmesan cheese, parsley, salt and pepper. In another bowl, combine the butter, lemon juice and garlic. Dip chicken in butter mixture, then roll in crumbs.

Roll-up chicken jelly-roll style; place seam side down in a greased 11-in. x 7-in. baking dish. Drizzle with any remaining butter mixture; sprinkle with paprika.

Bake, uncovered, at 350° for 35 minutes or until juices run clear. 

**Paco cooked this up for me (what a guy) and didn't follow these directions exactly.  No surprise here.  He didn't roll the chicken up, which didn't seem to effect the cooking time or taste at all.  We also thought it needed just a little more salt and pepper.
This was a hit with all of us! It was quick and easy and tasted spectacular. I love when we find something so easy and tasty.  It will definitely be going on the menu rotation again.

More baking will be coming soon, I promise!  I have a bunch of willing taste testers around here.  

Until then, here's to more Smoochin' in the Kitchen! 

Friday, August 24, 2012

Penne alla Vodka

It's no news around here that I love my Pinterest.  It's really too bad that it wasn't around when we got married or each time I was pregnant.  Or is it really too bad?

I do love pinning new and different treats that I find.  Sometimes I actually try them.  Seriously.  And then sometimes, I look back over them later and think, "nah. Kids just aren't going to go for that."

Then I found the penne alla vodka recipe.  I knew I was going to have to try it out and hope and pray that everyone loved it, because I had already made up my mind that I did.

(pinned from the kitchn)

Penne alla Vodka
serves 4-6


2012_08_16-PenneVodka-2.jpg

Ingredients

2 tablespoons olive oil
3 ounces thinly sliced prosciutto, finely chopped (optional)
1/2 sweet onion, finely chopped
1 tablespoon tomato paste
3-4 garlic cloves, pressed
1 28-ounce can diced tomatoes (I like chef's cut)
1/4 teaspoon red pepper flakes, to taste
2 teaspoons sugar
1 teaspoon kosher salt
1/3 cup vodka
1/2 cup heavy cream
1 pound (16 ounces) penne pasta
Parmesan cheese, for serving
Chopped parsley, for serving

Directions

Heat the olive oil in a large Dutch oven over medium-high heat until very hot but not smoking. Add prosciutto and cook, stirring occasionally, until crisp, about 4-5 minutes. Remove with a slotted spoon and set aside.

Reduce heat to medium. Add the onions and cook until softened and golden brown, about 5 minutes. Add the tomato paste and garlic, stirring to combine, and sauté for 2 more minutes.

Stir the tomatoes, red pepper flakes, sugar, and salt into the onion mixure. Stir in the vodka and increase heat back to medium-high. Briskly simmer for 8 - 10 minutes, stirring frequently, until the alcohol flavor has cooked off. Reduce heat to low and whisk in heavy cream.

While making the vodka sauce, bring a large stockpot of heavily salted water to a boil. Add pasta and cook, stirring occasionally, until al dente according to package directions. Reserve 1/4 cup cooking water before draining. Gently fold the cooked penne and reserved prosciutto into the vodka sauce and continue cooking on low heat for another couple of minutes. (I actually use a little less than one pound of pasta because I like mine very saucy, but it is easier to just cook the pound and add it to the sauce to taste.) Toss with a bit of pasta water if sauce is too thick.

Season with additional salt and red pepper flakes if desired, and serve with fresh Parmesan and chopped parsley.


The results?  Oh. my. gosh.  Everyone loved this!  Even though the red pepper flakes gave it a little kick, it was promptly pronounced a "do-over", which is always a good thing.

**I didn't use any prosciutto for the simple reason that we didn't have any, but I can only imagine how terribly amazing that would make it.  However, if you're looking for a great meat-less dish, this can stand on it's own two feet.

Friday, July 27, 2012

Machaca Beef Goodness

One of the big disappointments in being only half-Mexican is that you get to taste all the amazing homemade food your extended family makes, but no one teaches you.  Dang.  Well, that is if your dad is the Mexican one and is the non-cooker.  So that means I get to learn a lot by trial and error.  And the Internet.  Thank heaven's for the Internet!

For a long time, I've really been wanting to try to make authentic machaca beef.  I found this awesome recipe over at food.com.


Beef Machaca. Photo by Sue Lau
(photo courtesy of food.com)

Ingredients:


1 1/2 lbs boneless beef chuck roast
1 large onion, sliced
1 (4 ounce) can chopped green chilies
2 beef bouillon cubes
1 1/2 teaspoons dry mustard
1 tablespoon minced garlic
1 teaspoon seasoned adobo seasoning (note that this Latino seasoning is made with salt, cumin and garlic and is not the Phillipine versio) or 1 teaspoon salt
6 -8 peppercorns
1 cup salsa

Directions:

  1. Place beef in crockpot.
  2. Cover roast with remaining ingredients except salsa.
  3. Cover crockpot and cook on low for 8-10 hours or until roast is tender and can be pulled with a fork.
  4. Remove the beef from the crockpot and set the cooking liquid aside.
  5. Using two forks, shred beef.
  6. Mix beef with salsa, and if you like it a little moister, add some of the cooking liquid to the meat.
  7. Adjust the seasoning and add salt and pepper if necessary.
  8. Use as a filling for tacos, burritos, enchiladas, chimis, etc.

***Here's our review on it:  Oh.My.Stinkin'.Gosh.  Awesome!!  This was incredibly easy and yummy.  We made into burros last night and since I doubled the recipe, there was enough for tacos tonight.  My belly is already growling.

Did you try it?  Let me know how you like it.  In the mean time, here's to more Smoochin' in the Kitchen!

Friday, July 6, 2012

Pizza Margherita

Friday night around here is pizza night.  Always.  We love pizza and usually make our own, unless Paco pleads with those big brown eyes of his and I give in.

We usually make just a basic pizza dough and then the regular toppings.  Good, but not anything terribly special.

That is, until I found this recipe from (wait.  can you guess?)...  Yes, Taste of Home.  

I've had the recipe cut out and ready to try for um, a couple of years now.  Well, I finally got around to trying it and it is now our family's most favorite pizza ever.  No, seriously.  You should have seen us inhaling it.  It was enough to bring tears of joy to my eyes.

Traditionally, pizza margherita is meatless, which is fine by me, but not my carniverous hubby.  So I added 1 pound of italian sausage and it was awesome, although it would have retained the same level of awesomeness without it.

Pizza Margherita Recipe


Ingredients

  • 3 teaspoons active dry yeast
  • 1 cup warm water (110° to 115°)
  • 2 tablespoons olive oil
  • 1 teaspoon sugar
  • 1 teaspoon salt
  • 3 cups bread flour
  • TOPPINGS:
  • 2 cans (14-1/2 ounces each) diced tomatoes, drained
  • 20 fresh basil leaves, thinly sliced
  • 2 tablespoons minced fresh oregano or 2 teaspoons dried oregano
  • 8 cups (2 pounds) shredded part-skim mozzarella cheese
  • 1/2 teaspoon crushed red pepper flakes
  • 1/8 teaspoon salt
  • 1/8 teaspoon pepper
  • 2 tablespoons olive oil

Directions

  • In a small bowl, dissolve yeast in warm water. In a large bowl, combine the oil, sugar, salt and 1 cup flour; beat until smooth. Stir in enough remaining flour to form a soft dough.
  • Turn onto a floured surface; knead until smooth and elastic, about 6-8 minutes. Place in a greased bowl, turning once to grease the top. Cover with plastic wrap and let rise in a warm place until doubled, about 1 hour.
  • Punch dough down; divide in half. Roll each portion into a 13-in. circle. Transfer to two greased 14-in. pizza pans; build up edges slightly. Cover with a clean kitchen towel; let rest for 10 minutes.
  • Spoon tomatoes over dough. Top with basil (savor the fresh smell of that basil!), oregano, cheese (make sure you grate enough for little fingers to grab as they run by), pepper flakes, salt and pepper. Drizzle with oil. Bake at 450° for 15-20 minutes or until crust is golden brown.

*Because I'm having a love affair with my bread machine, I made the dough in the bread machine and I added a little bit of italian seasoning.  Super yummy and easy!

You could also use fresh tomatoes from your garden if you have one rather than the diced tomatoes.  Of course, if, like me, you have a black thumb and you live two miles away from the surface of the sun, you would understand how completely laughable that is for us.


Wednesday, April 25, 2012

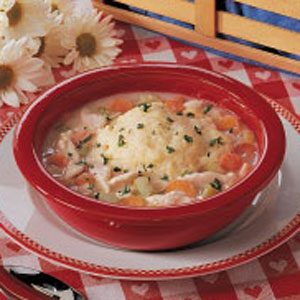
Homemade Chicken 'n' Buttermilk Dumplings

I love comfort food. Oh, you too? Everyone's comfort food is different and varied, but one thing is for sure, homemade chicken 'n' dumplin's is towards the top of everyone's list. That is unless you belong to one of those native tribes in the South American rainforest that hasn't ever seen modern clothing or technology.  So, (deep breath) if you are a member one of those native South America rainforest tribe that happens to come across this recipe sans modern technology (not even going there with the clothes), then I mean no offense and you should really try this recipe.

And everyone else should too, for that matter.  But this isn't just any chicken 'n' dumplin's.  It is made-from-scratch, no biscuit-mix-for-the-dumplins-please, kind of chicken 'n' dumplin's.  It will have you tucked up under your favorite blankie with your thumb in your mouth while watching the Wizard of OZ, even if you are thirty-three and five children are running in and out of the room calling you "Mama".  {ahem}

Mom's Chicken 'n' Buttermilk Dumplings Recipe


For all of its deliciousness, this recipe does take time and prep work.  That being said, it's totally worth it because it's pretty much the best chicken 'n' dumplin's I've ever tasted.

Ingredients

  • 1 stewing chicken (about 5 pounds), cut up
  • 10 cups water
  • 1 large onion, chopped
  • 2 medium carrots, sliced
  • 3 celery ribs, chopped
  • 4 garlic cloves, minced
  • 1 teaspoon salt
  • 1/4 cup butter
  • 6 tablespoons all-purpose flour
  • 1/8 teaspoon paprika
  • 1/8 teaspoon pepper
  • 1/2 cup half-and-half cream
DUMPLINGS:
  • 2 cups all-purpose flour
  • 4 teaspoons baking powder
  • 4 teaspoons sugar
  • 1 teaspoon salt
  • 2 eggs
  • 1/2 cup buttermilk
  • 1/4 cup butter, melted

Directions

  • In a soup kettle or Dutch oven, combine the first seven ingredients. Bring to a boil; skim foam from broth. Reduce heat; cover and simmer for 1-1/2 hours or until chicken is tender. Remove chicken; when cool enough to handle, debone and dice. Strain broth, reserving broth and vegetables.  This is a good job for your hubby's big muscles if your soup pot is as big as mine is. 
  • In the same kettle, melt butter. Stir in flour, paprika and pepper until smooth. Gradually stir in 6 cups reserved broth (save remaining broth for another use) *Make sure you have this ready to go or the butter will burn.* Bring to a boil; boil and stir for 2 minutes. Reduce heat; stir in the cream, reserved vegetables and chicken. Cover and bring to a boil; reduce the heat to simmer.
  • For dumplings, combine flour, baking powder, sugar and salt in a bowl. Combine eggs, buttermilk and butter; stir into dry ingredients to form a stiff batter.
  • Drop by tablespoonfuls onto simmering mixture. Cover and simmer for 20 minutes or until a toothpick inserted in a dumpling comes out clean (do not lift cover while simmering). Serve immediately. Yield: 6-8 servings.

*Just a note or two:  I ask the butcher at our neighborhood grocery store to cut up the whole chicken for me so that I don't have to do it when I get home.  (GAG!)  Did you know they would do that for you?  They always smile and are so gracious to me when I ask.  Okay, maybe not every time, but with five children, an astronomical grocery bill and with an interest in their own job security (which they benefit from), they'd better be at least smiling at me on the outside.  Also, even though it's already 100 degrees for us here, this is something that my family would eat year round.  It's nice to not have to heat up the oven or stand outside in the heat over a grill. 


Monday, April 2, 2012

Italian Sloppy Joes

Mmmm, these are one of our family's all-time favorites.   This is another recipe I found many moons ago from a Taste of Home magazine.  (Many moons ago...  aka less children, more money, bigger and cleaner house, much duller life.)

Every time I say we're having these for supper, a general outcry of joy erupts.  It's so easy to make, so it's perfect for our family of seven.  Plus, it makes a ton, so there are lots of leftovers.  Score!

Ready?

Italian Sloppy Joes Recipe
(photo courtesy of Taste of Home)

Ingredients

  • 1 pound mild or sweet italian sausage
  • 1 pound hot italian sausage
  • 4 garlic cloves, minced
  • 1 cup chopped green pepper
  • 1/2 cup chopped onion
  • 1 can (15 ounces) tomato sauce
  • 2 tablespoons minced fresh parsley
  • 1 teaspoon dried oregano
  • 1/2 teaspoon chili powder
  • 1/4 teaspoon fennel seed
  • 8 to 10 French or submarine rolls, split
  • 3/4 cup shredded mozzarella cheese


Directions

  • In a large saucepan or Dutch oven, cook sausage, garlic, green pepper and onion over medium heat until the sausage is no longer pink; drain. Add the tomato sauce and seasonings; bring to a boil. Reduce heat; cover and simmer for 30 minutes. Spoon about 1/2 cup onto each roll; sprinkle with cheese. Yield: 8-10 servings.
*I have also used italian-seasoned ground turkey and it turns out just as yummy!  Either way, this recipe is a definite comfort food for our family.  You can use my bread machine Garlic Hoagie Roll recipe and I promise your family (parents, boyfriend, dogs, whatever) will love you forever.

This is linked up to Tuesday's Tasty Tidbits at Permanent Posies.

PeppersTuesdaysTastyTidbits-1_thumb_

Monday, February 20, 2012

Teriyaki Pork Roast

Oh my goodness, my mouth is watering right now as it's simmering along in my lovely slow cooker.  Yup, it's what's for dinner tonight.  This is one of our family's faves and seeing as pork loins are on sale this week, it was definitely put on the menu. 

Yes, I meal plan.  And yes, it's an absolute lifesaver.  I've been doing it since we got married and I can't imagine not having one.  I might not be as organized as I'd like to be in other areas of my life, but in this area, I try really hard to keep on top of it.  If you have any questions about how I do it, I'd love to answer them as well as I'm able.

In the mean time, here we go with teriyaki pork roast...

Ingredients:

3/4 cup unsweetened apple juice
2 T. sugar
2 T. soy sauce
1 T. vinegar
1 t. ground ginger
1/4 t. garlic powder
1/8 t. pepper
3 lb. boneless pork loin
2 1/2 T. cornstarch
3 T. cold water

Directions:

- Combine apple juice, sugar, soy sauce, vinegar, ginger, garlic powder, and pepper in a greased slow cooker.

- Add roast.  Turn to coat.

- Cover and cook on low 7-8 hours.  Remove roast and keep warm.

- In a small saucepan, combine cornstarch and cold water until smooth.  Stir in juices from roast.  Bring to a boil.  Cook and stir for 2 minutes or until thickened.  Serve with roast.

*It's as easy as that!  This is a great and easy recipe to toss into the slow cooker in the morning and have it simmer all day long.  We serve it over brown rice with the sauce and it's. so. yummy.  I always try to serve a vegetable to balance out the starchy rice, so we're trying a new asparagus recipe tonight from Gooseberry Patch.  I'll get back to you on that one.  Hopefully, it's a hit!  It's always good to have veggie recipes everyone likes.

Until next time, here's to more smooches in the kitchen!


PeppersTuesdaysTastyTidbits (1)

Linking up to Permanent Posie's Tuesday's Tasty Tidbits.

Monday, January 2, 2012

Paco's Primo Pizza Sauce

Happy 2012!!

New Year's would not be New Year's at our house without pizza in some way, shape or form.  We absolutely love it, Paco especially.

We make our own pizza dough in the bread machine (easy, peasy lemon squeezy) using the recipe that came with the machine.  I always add a few extra (wink, wink) ingredients though, to give it a extra dose of Smoochin' in the Kitchen goodness.  I add garlic powder, rosemary, italian seasoning and herbs d' provence (my especial favorite).  All of this is to taste, so play around with it.

Speaking of "to taste", we wanted to share Paco's pizza sauce with you and there are like, no measurements.  You just have to sample over and over.  (so sad, right?)

So here's Paco's Primo Pizza Sauce:

can of tomato sauce
spoonful of tomato paste (if you like thicker sauce)
about 2 T. olive oil
2 t. of granulated garlic
1/2 t. onion powder
1 T. italian seasoning
2 t. pepper
oregano to taste
basil to taste
pinch of sugar
pinch of salt
pinch of wifey (hee, hee)
1 t. crushed red pepper (if you like it a wee bit spicy, like we do)

**Again, these are all approximations.  Just play with it.  Also, when making the dough, use the garlic powder because it's finer.  But, when making the sauce, use granulated garlic because if you use the powder it clumps too easily.

Got all that?  This just gives you a rough idea of what he put's in our sauce here in our kitchen.  Really, it's one of the big reasons I fell in love with him.  The Kitchen-Aid Standing Mixer just sealed the deal all those years ago.

If you do something special to your sauce that you just love, will you share it with us?  Or if you try this, let us know!

Here's to many smooches in the kitchen for you in 2012!

Saturday, December 10, 2011

Homemade Spaghetti Sauce

We love Italian food.  (If only you knew how much of an understatement that is...)  It ranks up there with Jesus, each other, our children and chocolate.  Do not underestimate the love of Italian food in this house. Give us pasta, garlic, olive oil and just about any kind of sauce and we are happy people.  We have garlic breath, but we're happy.  At least it's only Paco and Jamie smoochin' each other in the kitchen.  No one else would want to!

When we were first married and I was learning more about cooking, I knew I wanted to find a good homemade spaghetti sauce recipe.  I found one pretty early on and have made it about a million times over the years.  Okay, maybe not a million, but a ton anyways.  This recipe will make enough sauce for two meals, although I have a feeling with three boys growing up here, it won't stay that way for much longer.

Here we go...

Ingredients:

1 1/2 - 2 lbs ground beef
2 green peppers, chopped
1 large onion, chopped
1 stalk celery, chopped
2 bay leaves
1 1/2 t. dried oregano
1 1/2 t. dried thyme
1 1/2 t. Italian seasoning
1 1/2 t. dried basil
1 1/2 t. pepper
2 t. salt
1 T. sugar
6 oz. can tomato paste
2 15 oz. cans tomato sauce
1/2 c. water
1 T. olive oil

Directions:

Brown beef in a skillet, drain and transfer into large pot.  Combine peppers, onions, celery in pot.  In separate bowl, mix together remaining ingredients; add to beef mixture.  Simmer over low heat for 3 to 4 hours, stirring occasionally (swatting hubby with the wooden spoon for sampling before it's ready and then kiss him, hoping that will hold him over).  Remove bay leaves.  Serve over cooked pasta.  Makes 6 to 8 servings.

Notes:  You can always add mushrooms if you'd like.  Paco is a major fan of fungus, Jamie is (for some strange reason) not.  Also, be sure to remove the bay leaves!  The bay leaves absorb all the acid produced in the sauce and if they're eaten, they could produce major upset stomach yuckiness.  And nobody wants that.  The garlic breath is enough to contend with.

Set the table in romantic kind of way for seven, complete with plastic plates and sippy cups.  Look at each other lovingly as five children are happily slurping up spaghetti a la Lady and the Tramp.  Wait.  Maybe that's just our house.  Okay, technically only four kids are eating spaghetti.  Baby Jack will be joining them in no time, though.  Better start doubling this batch.

As always, if you try this let us know what you think! 

PS This freezes beautifully in Ziploc gallon bags.  When you freeze it, make sure you lay it flat in the freezer so it doesn't freeze into sharp angles, causing the bag to get holes.  As it's defrosting, I always put it in a bowl in the sink to catch any drips.

Saturday, November 19, 2011

Our First Post (and A Confession of Love For Paula Deen's Chicken Pot Pie)

Hi, hi, HI!!

Welcome to Smootchin' in the Kitchen!  This is our very first post and we're really excited to be here sharing with you.

Paco and I (Jamie) are newlyweds (okay, not really, but we still feel like it) who love to cook together.  Actually even though we both like cooking, he's better at it than I am but I manage to hold my own in the baking department.  We are guilty of dancing and smootchin' in the kitchen (hence the title of the blog) much to our children's delighted "Ewwww, gross" comments.  I'll be setting up an "About Us" page soon, but we really wanted to get to sharing our recipes with you.

So for today.... Drum roll please!!

It's our favorite: 

Paula Deen's Hurry Up Chicken Pot Pie


If you'd like, you can watch this video telling you how to put it all together, but it's so easy you really don't have to watch it.  If you are, however, a massive fan of Paula Deen and her adorable accent, watch away and giggle to yourself as she says carrots.

Ingredients:
  • 2 cups chopped cooked chicken breast 
  • 1/2 cup thinly sliced carrots, cooked
  • 1/2 cup frozen peas 
  • 1 (10 3/4-ounce) can cream of chicken soup
  • 1 cup chicken broth
  • Salt and pepper, optional
  • 1 1/2 cups instant biscuit mix (Bisquick)
  • 1 cup milk
  • 1 stick melted butter (of couse a whole stick.  It IS a Paula Deen recipe)

Directions

Preheat oven to 350 degrees F.
In a greased 2-quart casserole dish, layer the chicken, carrots, and peas. Mix the soup, chicken broth, and season with salt and pepper, if desired. Pour over the layers. Stir together the biscuit mix and milk, and pour this over the casserole. Stop for a minute and smooch your sweetheart.  (That wasn't in Paula's directions, but still a good idea, yes?)  Drizzle butter over the topping. Bake until the topping is golden brown, 30 to 40 minutes.

***Note:  I don't add the boiled eggs like she does.  Ugh, just couldn't stomach the thought of it, but if you do try it that way let me know.  It also takes longer in my oven to cook.  You may need to play with the time and your oven.

I've been making this recipes for many,  many moons now and it's one of my kiddos favorites.  In fact, our son Sam always makes this his dinner choice for his birthday.

If you try it, let me know how it turns out for you.  After all, it is a Paula Deen recipe so it has to be good, right?

I'll be posting some of my favorite baking recipes soon, so make sure you come back and check 'em out!
Related Posts Plugin for WordPress, Blogger...