Monday, December 26, 2011

Christmas Recipes

Oh my goodness.  The last several weeks have been such a blur of kitchen goodness and I haven't been able to get here to share with you!  I've wanted to, gotten so close to the keyboard a couple of times and have been dragged away as I'm screaming out But. I. Must. Blog. About. This!

Now I have some serious making up to do.

I have been cooking and baking and baking and cooking and now I just want to wallow around in all of the leftovers, making everyone else eat all the fudge and cookies so that I can still fit into my pants.

Here are some of the recipes we tried in the month of December:

Baking

Almost a Candy Bar
Chocolate Raspberry Bars
Double Chocolate Biscotti
Cranberry Orange Scones

Cooking

Vegetable Lasagna - Christmas dinner
Sausage and Peppers Lasagna - Christmas dinner
Pasta e Fagioli soup - Christmas Eve dinner

I'll share these recipes later, but if you don't want to wait, just click on the link and they'll take you right to where you need to go.  Most of them are Taste of Home Recipes (again, one of my favorite recipe sources), so they're almost guaranteed to be awesomely delicious.

But my absolute, hands-down favorite thing we made for Christmas dinner was the Caprese Skewers that I found on Pinterest.  Oh. My. Stinkin'. Gosh.  Seriously, the easiest thing I've ever made and they were perfect Christmas colors.


You must try these.  You must.  No seriously, do it.  You don't even need a freakin' recipe!!

I will be back in a while and fill you in on the rest of the recipes if you don't want to click on the links up there.

Enjoy the rest of your day and don't forget to smooch in the kitchen!

Saturday, December 10, 2011

Homemade Spaghetti Sauce

We love Italian food.  (If only you knew how much of an understatement that is...)  It ranks up there with Jesus, each other, our children and chocolate.  Do not underestimate the love of Italian food in this house. Give us pasta, garlic, olive oil and just about any kind of sauce and we are happy people.  We have garlic breath, but we're happy.  At least it's only Paco and Jamie smoochin' each other in the kitchen.  No one else would want to!

When we were first married and I was learning more about cooking, I knew I wanted to find a good homemade spaghetti sauce recipe.  I found one pretty early on and have made it about a million times over the years.  Okay, maybe not a million, but a ton anyways.  This recipe will make enough sauce for two meals, although I have a feeling with three boys growing up here, it won't stay that way for much longer.

Here we go...

Ingredients:

1 1/2 - 2 lbs ground beef
2 green peppers, chopped
1 large onion, chopped
1 stalk celery, chopped
2 bay leaves
1 1/2 t. dried oregano
1 1/2 t. dried thyme
1 1/2 t. Italian seasoning
1 1/2 t. dried basil
1 1/2 t. pepper
2 t. salt
1 T. sugar
6 oz. can tomato paste
2 15 oz. cans tomato sauce
1/2 c. water
1 T. olive oil

Directions:

Brown beef in a skillet, drain and transfer into large pot.  Combine peppers, onions, celery in pot.  In separate bowl, mix together remaining ingredients; add to beef mixture.  Simmer over low heat for 3 to 4 hours, stirring occasionally (swatting hubby with the wooden spoon for sampling before it's ready and then kiss him, hoping that will hold him over).  Remove bay leaves.  Serve over cooked pasta.  Makes 6 to 8 servings.

Notes:  You can always add mushrooms if you'd like.  Paco is a major fan of fungus, Jamie is (for some strange reason) not.  Also, be sure to remove the bay leaves!  The bay leaves absorb all the acid produced in the sauce and if they're eaten, they could produce major upset stomach yuckiness.  And nobody wants that.  The garlic breath is enough to contend with.

Set the table in romantic kind of way for seven, complete with plastic plates and sippy cups.  Look at each other lovingly as five children are happily slurping up spaghetti a la Lady and the Tramp.  Wait.  Maybe that's just our house.  Okay, technically only four kids are eating spaghetti.  Baby Jack will be joining them in no time, though.  Better start doubling this batch.

As always, if you try this let us know what you think! 

PS This freezes beautifully in Ziploc gallon bags.  When you freeze it, make sure you lay it flat in the freezer so it doesn't freeze into sharp angles, causing the bag to get holes.  As it's defrosting, I always put it in a bowl in the sink to catch any drips.

Sunday, December 4, 2011

Easy-Peasy Sugar Cookies

I love baking.  I think I may have said this before... once or twice.  I especially love holiday baking.  Except sugar cookies.  And wouldn't you know, my kids beg for sugar cookies every year.  Every year.  I love to eat sugar cookies.  I just despise making them.  It's messy, it requires patience and tons of cleaning up and when I let my kids decorate them, well, let's just say I'm not interested in eating cookies that have been dropped on the floor and then frosted the finger-painting method. 

Call me a bad mama if you want, I won't care.

However, a fragile compromise was reached tonight.  We found a recipe that required no refrigerator time for the dough, no rolling out, and definitely no finger-painting of frosting.  In fact,  no frosting at all!  Can I get an "Amen, sis-tah?"

And let me tell you, I can promise that these are terribly fun to do with kids and they're wicked tasty.  Definitely win-win.  Look at that smile.  Doesn't he look like he's having fun?


Ingredients:

2 large eggs
2/3 cup vegetable oil
2 t. vanilla
3/4 cup white sugar
2 cups flour
2 t. baking powder
1/2 t. salt

Yup, that's it.  Seriously easy.

Directions:

Beat together eggs, oil, vanilla, and sugar; add flour, baking powder, and salt.  Mix well.

Drop by heaping teaaspoon (approx. 3" apart) on ungreased cookie sheet.

Flatten with bottom of glass moistened with water and dipped in sugar.

Bake at 400 degrees for 6-10 minutes or just until lightly golden.

Eat while watching White Christmas and dream of beautiful Edith Head dresses.

Stop eating when you realize you really, really don't want your kids to ask how many cookies you've eaten. 

Not that I would know about that or anything.

The End.


linked up to Skip To My Lou for Made by You Monday!

Sunday, November 27, 2011

Thanksgiving Menu and the Amazing Bread Machine Cinnamon Roll Recipe

I don't know about you, but we're just emerging from a turkey-induced coma over here.  We've been wanting to post, but as soon as we'd get near the computer, our eyes would glaze over and the drooling would begin again in earnest.

I thought I'd give you a run-down on what was put out on our enormous farm-house dining room table this year.  Our table was literally groaning with food.  Even our kids looked at the spread and said, "That's a lot of food."  If they say that, then you know that you'd better have elastic waist pants on.

For Breakfast:

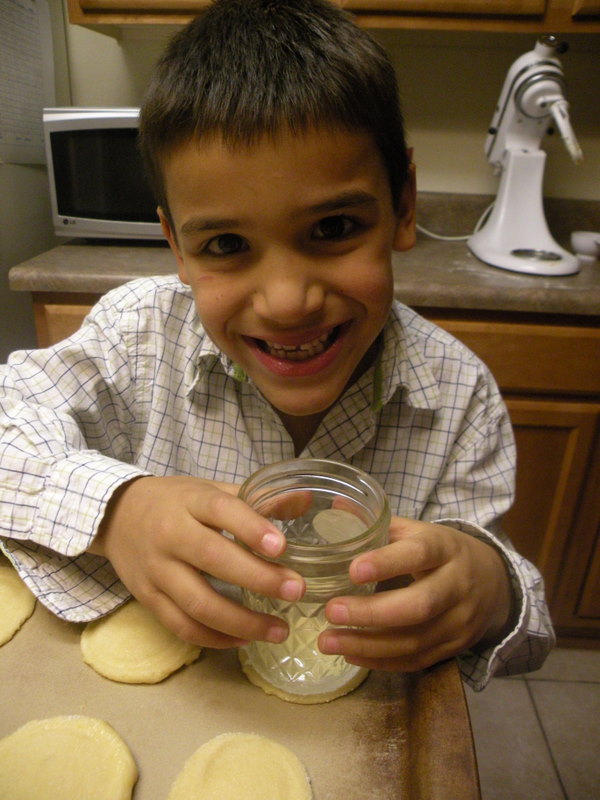
Homemade Cinnamon Rolls

We got the party started early!  I made cinnamon roll dough in the bread machine and then made them the usual way the day before.  I'll share the recipe in just a sec.

For Dinner:

(by Paco and Jamie)

The turkey...  (angels are singing) 
Mashed potatoes
Homemade stuffing
Baked Apples
Pumpkin Roll (shared on Jamie's "mama-blog" last fall)
Two Pumpkin Pies

(by Rosie, Paco's amazing mamacita)

Corn souffle (must. get. this. recipe.)
Green salad with blueberries, mushrooms, walnuts and a vinaigrette
Cranberry jello
Peach Pie

Can you see why we haven't posted in a while?

Paco had been planning the turkey for weeks now.  He was drooling over the Food Network magazine and researching on-line how to make "his" turkey.

He's about as bad as the dad on the movie "A Christmas Story."


Don't touch that turkey... in A Christmas Story (1983)

Seriously. 

He debated grilling, roasting, brining, or smoking it.  In the end, the poor, poor turkey was injected with fluid and smoked on the grill.  My heart went out to that turkey.  I can't imagine how bloated it felt.  Um, actually, I can. 

In the end, is was perfectly delicious.  That turkey's death was not in vain.

Now, for the cinnamon roll recipe...  Ready?


Ingredients

3/4 cup water
1 egg, lightly beaten
2 t. vanilla
3 cups all-purpose flour
6 T. sugar
1/4 cup softened butter
1 t. salt
2 T. milk
1 1/2 t. yeast

*Filling*

1/4 cup butter, melted
2/3 cup brown sugar, mixed with 2 t. cinnamon

*Icing*

3 T. butter
1 t. vanilla
3 T. hot water
2 cups confectioner's sugar

Directions

In bread machine, add ingredients according to manufacturer's suggested order (dry ingredients first, liquid second, yeast last) and set on dough cycle.

Turn onto lightly floured board.  Roll out to a rectangle about 10 x 18 inches.  Brush with melted butter, sprinkle with cinnamon-brown sugar mixture.

Starting at long end, carefully roll up, pinching seams together.  Measure and cut 1-inch slices.  Place cut side up on a buttered baking sheet.  Cover with a slightly dampened towel and let rise in a warm place for 45-1 hour (or until doubled in size). 

Bake at 375 degrees for 15 minutes or until browned. 

For the icing, melt butter in a medium saucepan; add hot water and vanilla.  Remove from heat then stir in confectioner's sugar.  Add more hot water, 1/2 to 1 teaspoon at a time until desired consistency.  Drizzle over warm rolls.

(Makes 12)

Loosen your belt, sit back and thank the good Lord for cinnamon rolls.

Then it's time to start thinking about the Christmas menu.
PermanetPosies.com

I'm linking up over at Skip to My Lou and Permanent Posies today.  If you're hopping over from there, let me know.  We're just getting started blogging over here so we love visitors!  You can always become a follower or join our email list.  Thanks for stopping by!

Monday, November 21, 2011

Pineapple Upside-Down Cake...Drool, Drool

My (Jamie) dad, Tony, does not have a sweet tooth.  In fact, he loves to brag about how he detests chocolate and peanut butter just to see people's jaws drop whenever it's brought up.  How in the world could I come from such a man?

I don't know.  I just shake my head and mutter to myself. 

He does like, however, fruit-y kinds of desserts.  Sometimes.  Kinda.

But Superman's daughter has found his Kryptonite.  Oh yeah, baby!  His birthday was last weekend (happy birthday, daddy!) and I wanted to find something that would make him forget all about his previous prejudices against dessert.  And this is what did it:

Spiced Pineapple Upside-Down Cake Recipe
(photo courtesy of Taste of Home recipes)

Spiced Pineapple Upside-Down Cake

Ingredients:
  • 1-1/3 cups butter, softened, divided
  • 1 cup packed brown sugar
  • 1 can (20 ounces) pineapple slices, drained
  • 10 to 12 maraschino cherries
  • 1/2 cup chopped pecans
  • 1-1/2 cups sugar
  • 2 eggs
  • 1 teaspoon Spice Islands® pure vanilla extract
  • 2 cups all-purpose flour
  • 2 teaspoons baking powder
  • 1/2 teaspoon baking soda
  • 1/2 teaspoon salt
  • 1/2 teaspoon ground cinnamon
  • 1/2 teaspoon ground nutmeg
  • 1 cup buttermilk
 Directions
  • In a saucepan, melt 2/3 cup of butter; stir in brown sugar. Spread in the bottom of an ungreased heavy 12-in skillet or a 13-in. x 9-in. baking pan. Arrange pineapple in a single layer over sugar mixture; place a cherry in the center of each slice. Sprinkle with pecans and set aside. Sneak a smooch in there.
  • In a large bowl, cream sugar and remaining butter until light and fluffy. Add eggs, one at a time, beating well after each addition. Beat in vanilla. Combine the flour, baking powder, baking soda, salt, cinnamon and nutmeg; add alternately to batter with buttermilk, beating well after each addition.
  • Carefully pour over the pineapple. Bake at 350° for 40 minutes for skillet (50-60 minutes for baking pan) or until a toothpick inserted near the center comes out clean. Immediately invert onto a serving platter. Serve warm. Yield: 12 servings.
Notes*** I didn't use the nutmeg or pecans.  Again, Dad isn't a fan (silly dad).  I greased the sides of the pan so that the cake would come out easily and it was fine.  Also, when I added the flour mixture and buttermilk alternately, I started and finished with the dry ingredients.  It mixes better that way.

Everyone loved this cake!  Both Tony and Paco (not a huge fan of pineapple upside-down cake) ate it until they felt like they were about to pop.

Now, THAT's the mark of a successful dessert.

(recipe courtesy of Taste of Home)

Saturday, November 19, 2011

Our First Post (and A Confession of Love For Paula Deen's Chicken Pot Pie)

Hi, hi, HI!!

Welcome to Smootchin' in the Kitchen!  This is our very first post and we're really excited to be here sharing with you.

Paco and I (Jamie) are newlyweds (okay, not really, but we still feel like it) who love to cook together.  Actually even though we both like cooking, he's better at it than I am but I manage to hold my own in the baking department.  We are guilty of dancing and smootchin' in the kitchen (hence the title of the blog) much to our children's delighted "Ewwww, gross" comments.  I'll be setting up an "About Us" page soon, but we really wanted to get to sharing our recipes with you.

So for today.... Drum roll please!!

It's our favorite: 

Paula Deen's Hurry Up Chicken Pot Pie


If you'd like, you can watch this video telling you how to put it all together, but it's so easy you really don't have to watch it.  If you are, however, a massive fan of Paula Deen and her adorable accent, watch away and giggle to yourself as she says carrots.

Ingredients:
  • 2 cups chopped cooked chicken breast 
  • 1/2 cup thinly sliced carrots, cooked
  • 1/2 cup frozen peas 
  • 1 (10 3/4-ounce) can cream of chicken soup
  • 1 cup chicken broth
  • Salt and pepper, optional
  • 1 1/2 cups instant biscuit mix (Bisquick)
  • 1 cup milk
  • 1 stick melted butter (of couse a whole stick.  It IS a Paula Deen recipe)

Directions

Preheat oven to 350 degrees F.
In a greased 2-quart casserole dish, layer the chicken, carrots, and peas. Mix the soup, chicken broth, and season with salt and pepper, if desired. Pour over the layers. Stir together the biscuit mix and milk, and pour this over the casserole. Stop for a minute and smooch your sweetheart.  (That wasn't in Paula's directions, but still a good idea, yes?)  Drizzle butter over the topping. Bake until the topping is golden brown, 30 to 40 minutes.

***Note:  I don't add the boiled eggs like she does.  Ugh, just couldn't stomach the thought of it, but if you do try it that way let me know.  It also takes longer in my oven to cook.  You may need to play with the time and your oven.

I've been making this recipes for many,  many moons now and it's one of my kiddos favorites.  In fact, our son Sam always makes this his dinner choice for his birthday.

If you try it, let me know how it turns out for you.  After all, it is a Paula Deen recipe so it has to be good, right?

I'll be posting some of my favorite baking recipes soon, so make sure you come back and check 'em out!
Related Posts Plugin for WordPress, Blogger...